
Introduction
Oracle GoldenGate (OGG) is a real-time data replication platform that enables seamless data integration between heterogeneous databases. It supports high throughput, minimal latency, and advanced deployment architectures. As a CDC (Change Data Capture) tool, it captures committed changes from the source database transaction logs and replicates them to a target database.
In this article, we will walk through the installation of Oracle GoldenGate 23ai (version 23.4.1.24.05) for Oracle, from OS preparation through service verification.
Prerequisites
Below are the minimum requirements for a Linux environment:
- CPU: 2 cores
- RAM: 4GB
- Disk space: 25GB
- OS: Oracle Linux 8/9
- Latest Oracle Instant Client
Software Download
- Oracle GoldenGate 23ai: Oracle GoldenGate 23.4.1.24.05 on Linux x86-64 for Oracle
- Oracle Instant Client: Oracle Instant Client Downloads for Linux x86-64
Environment Used in This Guide
| Item | Value |
|---|---|
| Hostname | ogg.oraeasy.com |
| IP | 192.168.101.9 |
| OS | OL9 |
| Oracle Client Home | /u01/app/instantclient_23_7 |
| OGG Home | /ogg/ogg23ai_ma |
| OGG Service Manager | /ogg/ogg23ai_sm |
| OGG Deployment Home | /ogg/ogg23ai_deploy |
Step 1: Prepare the OS for Installation
Before installing GoldenGate itself, the OS needs a compatibility package for OpenSSL, an Oracle user and group, and the target directories with correct ownership. SELinux is set to permissive and the firewall is disabled to avoid connectivity issues during setup.
Install Packages:

[root@ogg ~]# dnf install compat-openssl11
Last metadata expiration check: 0:26:18 ago on Thu 20 May 2025 12:33:52 AM IST.
Dependencies resolved.
==============================================================================================================================================================
 Package                                 Architecture                  Version                                     Repository                            Size
==============================================================================================================================================================
Installing:
 compat-openssl11                        x86_64                        1:1.1.1k-4.0.1.el9_0                        ol9_appstream                        1.5 M

Transaction Summary
==============================================================================================================================================================
Install  1 Package

Total download size: 1.5 M
Installed size: 3.7 M
Is this ok [y/N]: y
Downloading Packages:
compat-openssl11-1.1.1k-4.0.1.el9_0.x86_64.rpm                                                                                1.6 MB/s | 1.5 MB     00:00
--------------------------------------------------------------------------------------------------------------------------------------------------------------
Total                                                                                                                         1.6 MB/s | 1.5 MB     00:00
Oracle Linux 9 Application Stream Packages (x86_64)                                                                           5.7 MB/s | 6.2 kB     00:00
Importing GPG key 0x8D8B756F:
 Userid     : "Oracle Linux (release key 1) "
 Fingerprint: 3E6D 826D 3FBA B389 C2F3 8E34 BC4D 06A0 8D8B 756F
 From       : /etc/pki/rpm-gpg/RPM-GPG-KEY-oracle
Is this ok [y/N]: y
Key imported successfully
Importing GPG key 0x8B4EFBE6:
 Userid     : "Oracle Linux (backup key 1) "
 Fingerprint: 9822 3175 9C74 6706 5D0C E9B2 A7DD 0708 8B4E FBE6
 From       : /etc/pki/rpm-gpg/RPM-GPG-KEY-oracle
Is this ok [y/N]: y
Key imported successfully
Running transaction check
Transaction check succeeded.
Running transaction test
Transaction test succeeded.
Running transaction
  Preparing        :                                                                                                                                      1/1
  Installing       : compat-openssl11-1:1.1.1k-4.0.1.el9_0.x86_64                                                                                         1/1
  Running scriptlet: compat-openssl11-1:1.1.1k-4.0.1.el9_0.x86_64                                                                                         1/1
  Verifying        : compat-openssl11-1:1.1.1k-4.0.1.el9_0.x86_64                                                                                         1/1

Installed:
  compat-openssl11-1:1.1.1k-4.0.1.el9_0.x86_64

Complete!

Create Oracle User & Its Group:

[root@ogg ~]# groupadd -g 54321 oinstall
[root@ogg ~]# groupadd -g 54322 dba
[root@ogg ~]# useradd -u 54321 -g oinstall -G dba oracle
[root@ogg ~]# passwd oracle
Changing password for user oracle.
New password:
BAD PASSWORD: The password is shorter than 8 characters
Retype new password:
passwd: all authentication tokens updated successfully.

Directory Creation & Ownership Change:

[root@ogg ~]# mkdir -p /u01/app/
[root@ogg ~]# chown -R oracle:oinstall /u01
[root@ogg ~]# chmod -R 775 /u01
[root@ogg ~]# mkdir -p /ogg/ogg23ai_ma
[root@ogg ~]# mkdir -p /ogg/ogg23ai_sm
[root@ogg ~]# mkdir -p /ogg/ogg23ai_deploy
[root@ogg ~]# chown -R oracle:oinstall /ogg
[root@ogg ~]# chmod -R 775 /ogg

SELinux => Permissive:

[root@ogg ~]# cat /etc/selinux/config

# This file controls the state of SELinux on the system.
# SELINUX= can take one of these three values:
#     enforcing - SELinux security policy is enforced.
#     permissive - SELinux prints warnings instead of enforcing.
#     disabled - No SELinux policy is loaded.
# See also:
# https://access.redhat.com/documentation/en-us/red_hat_enterprise_linux/9/html/using_selinux/changing-selinux-states-and-modes_using-selinux#changing-selinux    -modes-at-boot-time_changing-selinux-states-and-modes
#
# NOTE: Up to RHEL 8 release included, SELINUX=disabled would also
# fully disable SELinux during boot. If you need a system with SELinux
# fully disabled instead of SELinux running with no policy loaded, you
# need to pass selinux=0 to the kernel command line. You can use grubby
# to persistently set the bootloader to boot with selinux=0:
#
#    grubby --update-kernel ALL --args selinux=0
#
# To revert back to SELinux enabled:
#
#    grubby --update-kernel ALL --remove-args selinux
#
SELINUX=permissive
# SELINUXTYPE= can take one of these three values:
#     targeted - Targeted processes are protected,
#     minimum - Modification of targeted policy. Only selected processes are protected.
#     mls - Multi Level Security protection.
SELINUXTYPE=targeted

Disable Firewall:

[root@ogg ~]# systemctl status firewalld
● firewalld.service - firewalld - dynamic firewall daemon
     Loaded: loaded (/usr/lib/systemd/system/firewalld.service; enabled; preset: enabled)
     Active: active (running) since Tue 2025-05-20 11:39:36 IST; 46min ago
       Docs: man:firewalld(1)
   Main PID: 750 (firewalld)
      Tasks: 2 (limit: 21748)
     Memory: 40.6M
        CPU: 1.209s
     CGroup: /system.slice/firewalld.service
             └─750 /usr/bin/python3 -s /usr/sbin/firewalld --nofork --nopid

May 20 11:39:26 ogg.oraeasy.com systemd[1]: Starting firewalld - dynamic firewall daemon...
May 20 11:39:36 ogg.oraeasy.com systemd[1]: Started firewalld - dynamic firewall daemon.
[root@ogg ~]#
[root@ogg ~]#
[root@ogg ~]# systemctl stop firewalld
[root@ogg ~]#
[root@ogg ~]#
[root@ogg ~]# systemctl disable firewalld
Removed "/etc/systemd/system/multi-user.target.wants/firewalld.service".
Removed "/etc/systemd/system/dbus-org.fedoraproject.FirewallD1.service".
Step 2: Install and Configure Instant Client
GoldenGate needs Oracle client libraries to connect to the source and target databases. We unzip the Instant Client packages, create a version-agnostic symbolic link, and set up a tnsnames.ora file with entries for the databases we plan to replicate.
Place Software and Unzip them:

[oracle@ogg app]$ pwd
/u01/app
[oracle@ogg app]$ ll
-rw-r--r--. 1 oracle oinstall 128438949 May 20 12:38 instantclient-basic-linux.x64-23.7.0.25.01.zip
-rw-r--r--. 1 oracle oinstall   5524138 May 20 12:38 instantclient-sqlplus-linux.x64-23.7.0.25.01.zip
-rw-r--r--. 1 oracle oinstall   1442360 May 20 12:38 instantclient-tools-linux.x64-23.7.0.25.01.zip
[oracle@ogg app]$ unzip instantclient-basic-linux.x64-23.7.0.25.01.zip
[oracle@ogg app]$ unzip instantclient-sqlplus-linux.x64-23.7.0.25.01.zip
[oracle@ogg app]$ unzip instantclient-tools-linux.x64-23.7.0.25.01.zip
[oracle@ogg app]$ ll
drwxr-xr-x. 3 oracle oinstall      4096 May 20 12:39 instantclient_23_7
-rw-r--r--. 1 oracle oinstall 128438949 May 20 12:38 instantclient-basic-linux.x64-23.7.0.25.01.zip
-rw-r--r--. 1 oracle oinstall   5524138 May 20 12:38 instantclient-sqlplus-linux.x64-23.7.0.25.01.zip
-rw-r--r--. 1 oracle oinstall   1442360 May 20 12:38 instantclient-tools-linux.x64-23.7.0.25.01.zip
drwxr-xr-x. 2 oracle oinstall        64 May 20 12:39 META-INF

Run Below to Create Symbolic Link:

[oracle@ogg app]$  ln -s instantclient_23_7

Create tnsnames.ora File and Add Entry:

[oracle@ogg admin]$ cd /u01/app/instantclient_23_7/network/admin
[oracle@ogg admin]$ cat tnsnames.ora
ORCLDC =
  (DESCRIPTION =
    (ADDRESS_LIST =
      (ADDRESS = (PROTOCOL = TCP)(HOST = orcl.oraeasy.com)(PORT = 1521))
    )
    (CONNECT_DATA =
      (SERVICE_NAME = orcldc)
    )
  )

ORCLPDB =
  (DESCRIPTION =
    (ADDRESS_LIST =
      (ADDRESS = (PROTOCOL = TCP)(HOST = orcl.oraeasy.com)(PORT = 1521))
    )
    (CONNECT_DATA =
      (SERVICE_NAME = orclpdb)
    )
  )

Add Environment Variables and Check Login:

[oracle@ogg ~]$ cat .bash_profile
# .bash_profile

# Get the aliases and functions
if [ -f ~/.bashrc ]; then
        . ~/.bashrc
fi

# User specific environment and startup programs

export ORACLE_HOME=/u01/app/instantclient_23_7
export TNS_ADMIN=/u01/app/instantclient_23_7/network/admin
export PATH=$ORACLE_HOME:$PATH
export LD_LIBRARY_PATH=$ORACLE_HOME:$LD_LIBRARY_PATH
[oracle@ogg ~]$
[oracle@ogg ~]$ . .bash_profile
[oracle@ogg ~]$
[oracle@ogg ~]$ sqlplus sys@ORCLDC as sysdba

SQL*Plus: Release 23.0.0.0.0 - for Oracle Cloud and Engineered Systems on Fri May 20 12:21:49 2025
Version 23.7.0.25.01

Copyright (c) 1982, 2024, Oracle.  All rights reserved.

Enter password:

Connected to:
Oracle Database 19c Enterprise Edition Release 19.0.0.0.0 - Production
Version 19.27.0.0.0

SQL> show pdbs

    CON_ID CON_NAME                       OPEN MODE  RESTRICTED
---------- ------------------------------ ---------- ----------
         2 PDB$SEED                       READ ONLY  NO
         3 ORCLPDB                        READ WRITE NO
SQL>
Step 3: Place and Unzip the OGG Software
With the client in place, extract the GoldenGate installer archive to a staging location. This produces the ship home directory that the installer runs from.
[oracle@ogg oggsoft]$ pwd
/u01/oggsoft
[oracle@ogg oggsoft]$ ls -lrth
total 490M
-rw-r--r--. 1 oracle oinstall 490M May 22 00:09 OGG_ORACLE_V1042871-01.zip
[oracle@ogg oggsoft]$
[oracle@ogg oggsoft]$ unzip OGG_ORACLE_V1042871-01.zip
[oracle@ogg oggsoft]$ ls
fbo_ggs_Linux_x64_Oracle_services_shiphome  META-INF  OGG-23ai-README.txt  OGGCORE_Release_Notes_23.4.1.24.05.pdf  OGG_ORACLE_V1042871-01.zip
[oracle@ogg oggsoft]$
Step 4: Run the OGG Installation
The runInstaller script launches the Oracle Universal Installer GUI, which walks through home selection, prerequisite checks, and the actual file copy. A root script needs to run partway through to register the inventory.
[oracle@ogg oggsoft]$ pwd
/u01/oggsoft
[oracle@ogg oggsoft]$ cd fbo_ggs_Linux_x64_Oracle_services_shiphome/Disk1/
[oracle@ogg Disk1]$
[oracle@ogg Disk1]$ ls
install  response  runInstaller  stage
[oracle@ogg Disk1]$
[oracle@ogg Disk1]$
[oracle@ogg Disk1]$ ./runInstaller
Starting Oracle Universal Installer...

Checking Temp space: must be greater than 120 MB.   Actual 3693 MB    Passed
Checking swap space: must be greater than 150 MB.   Actual 4086 MB    Passed
Checking monitor: must be configured to display at least 256 colors.    Actual 16777216    Passed
Preparing to launch Oracle Universal Installer from /tmp/OraInstall2025-05-20_01-04-03PM. Please wait ...
[oracle@ogg Disk1]$
Now a GUI window will appear. Follow the instructions below.
Click Next

Provide the OGG Home: /ogg/ogg23ai_ma

Click Next

Click Install

Monitor the progress

Log in with the root user and run the script, then click OK.

[root@ogg ~]# /u01/app/oraInventory/orainstRoot.sh
Changing permissions of /u01/app/oraInventory.
Adding read,write permissions for group.
Removing read,write,execute permissions for world.

Changing groupname of /u01/app/oraInventory to oinstall.
The execution of the script is complete.
[root@ogg ~]#
Click Close

Step 5: Set Up Deployments and Create a Service Manager Using OGGCA
Once the binaries are installed, the OGGCA (Oracle GoldenGate Configuration Assistant) wizard creates the service manager and the first deployment. This is what registers GoldenGate as a running service on the host.
[oracle@ogg ~]$ cd /ogg/ogg23ai_ma/
[oracle@ogg ogg23ai_ma]$ ls
bin  deinstall  diagnostics  include  install  inventory  jdk  jlib  lib  OPatch  oraInst.loc  oui  srvm
[oracle@ogg ogg23ai_ma]$
[oracle@ogg ogg23ai_ma]$ cd bin/
[oracle@ogg bin]$ ls
adminclient  cachefiledump  chkptdump      convchk  defgen       distsrvr  extract  logdump   oggerr  pmsrvr    replicat  ServiceManager  XAGTask
adminsrvr    checkprm       ConfigService  convprm  diagnostics  emsclnt   keygen   oggca.sh  orapki  recvsrvr  retrace   trailscan
[oracle@ogg bin]$ ./oggca.sh
Now the OGGCA GUI window will appear. Follow the instructions below.
Provide the Software Home, Service Manager Home, hostname/IP, and port.

Provide the credentials used to access the OGG console.

Provide the deployment name, deployment home, hostname/IP, and port.

Check the box and click Next.

Click Finish

Monitor the progress


Click OK

Log in with the root user and run the script, then click OK.

[root@ogg ~]# /ogg/ogg23ai_sm/bin/registerServiceManager.sh
Copyright (c) 2017, 2024, Oracle and/or its affiliates. All rights reserved.
----------------------------------------------------
     Oracle GoldenGate Install As Service Script
----------------------------------------------------
OGG_HOME=/ogg/ogg23ai_ma
OGG_CONF_HOME=/ogg/ogg23ai_sm/etc/conf
OGG_VAR_HOME=/ogg/ogg23ai_sm/var
OGG_USER=oracle
Running OracleGoldenGateInstall.sh...
Created symlink /etc/systemd/system/multi-user.target.wants/OracleGoldenGate.service → /etc/systemd/system/OracleGoldenGate.service.
[root@ogg ~]#
Click Close

Step 6: Check the OGG Service Status on the Server
After registration, GoldenGate runs as a systemd service. Confirm it is active and review the child processes it spawns for the admin server, distribution server, receiver server, and process manager.
[oracle@ogg ~]$ systemctl status OracleGoldenGate
● OracleGoldenGate.service - Oracle GoldenGate Service Manager
     Loaded: loaded (/etc/systemd/system/OracleGoldenGate.service; enabled; preset: disabled)
     Active: active (running) since Sun 2025-05-20 12:31:00 IST; 4min 4s ago
   Main PID: 6992 (ServiceManager)
      Tasks: 111 (limit: 15712)
     Memory: 417.9M
        CPU: 16.257s
     CGroup: /system.slice/OracleGoldenGate.service
             ├─ 6992 /ogg/ogg23ai_ma/bin/ServiceManager --inventory "'/ogg/ogg23ai_sm/etc/conf'"
             ├─7396 /ogg/ogg23ai_ma/bin/adminsrvr --config /ogg/ogg23ai_sm/var/run/OggOracle-adminsrvr-config.dat
             ├─7398 /ogg/ogg23ai_ma/bin/distsrvr --config /ogg/ogg23ai_sm/var/run/OggOracle-distsrvr-config.dat
             ├─7402 /ogg/ogg23ai_ma/bin/recvsrvr --config /ogg/ogg23ai_sm/var/run/OggOracle-recvsrvr-config.dat
             └─7400 /ogg/ogg23ai_ma/bin/pmsrvr --config /ogg/ogg23ai_sm/var/run/OggOracle-pmsrvr-config.dat
[oracle@ogg ~]$

[oracle@ogg ~]$ ps -ef|grep ogg23ai
oracle      6992       1  1 May20 ?        00:00:02 /ogg/ogg23ai_ma/bin/ServiceManager --inventory '/ogg/ogg23ai_sm/etc/conf'
oracle      7396    6992  0 May20 ?        00:00:01 /ogg/ogg23ai_ma/bin/adminsrvr --config /ogg/ogg23ai_sm/var/run/OggOracle-adminsrvr-config.dat
oracle      7398    6992  5 May20 ?        00:00:06 /ogg/ogg23ai_ma/bin/distsrvr --config /ogg/ogg23ai_sm/var/run/OggOracle-distsrvr-config.dat
oracle      7400    6992  4 May20 ?        00:00:05 /ogg/ogg23ai_ma/bin/pmsrvr --config /ogg/ogg23ai_sm/var/run/OggOracle-pmsrvr-config.dat
oracle      7402    6992  1 May20 ?        00:00:01 /ogg/ogg23ai_ma/bin/recvsrvr --config /ogg/ogg23ai_sm/var/run/OggOracle-recvsrvr-config.dat
oracle      7540    5386  0 00:00 pts/1    00:00:00 grep --color=auto ogg23ai
Step 7: Log In to the Service Manager and Deployment Console
With the service running, both consoles should be reachable over HTTP using the credentials set during OGGCA. The Service Manager console runs on port 7801 and the deployment services console runs on port 7803.
http://192.168.101.9:7801 ==> Service Manager
http://192.168.101.9:7803 ==> Deployment Services
http://192.168.101.9:7801
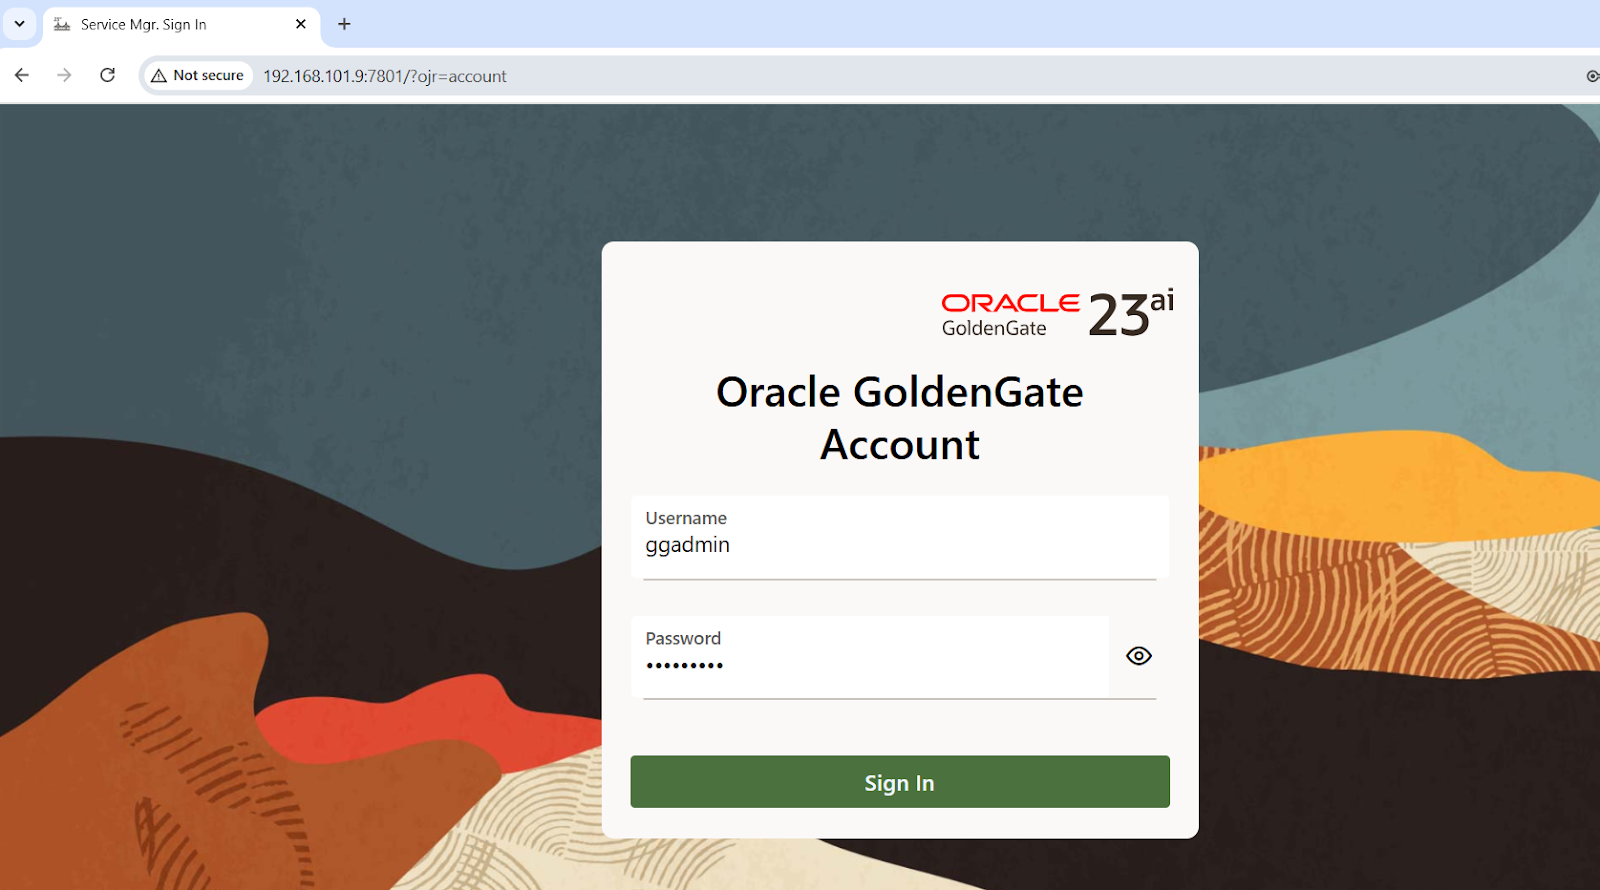

http://192.168.101.9:7803


At this point Oracle GoldenGate 23ai is installed, registered as a systemd service, and reachable through both the Service Manager and deployment consoles. From here you can create extract and replicat processes to start replicating data between your source and target databases.
Thank you for reading!
I hope this content has been helpful to you. Your feedback and suggestions are always welcome. Feel free to leave a comment or reach out with any queries.
Abhishek Shrivastava
Oracle DBA with hands-on experience managing production Data Guard, RAC, GoldenGate, and APEX environments. I write practical, tested installation and troubleshooting guides based on real deployment work.
Comments
Post a Comment